As you probably know by now, iOS 7 has brought a couple of changes to the design language. This means your app needs to be updated so as not to look out of place on the OS.
Here at the Vault, we are going through the same process. You may have 2 or 3 apps to work on. But in our case, we have over 30 templates to update! That’s going to be fun.
So I thought since I am going to be going through the same headaches, I might as well blog about it and let you know of the pitfalls you might encounter.
Below, I will detail some of the changes we made to the Foody design template. The changes are now live and you can download the updated version if you have bought it previously.
Skeuomorphic Or Flat
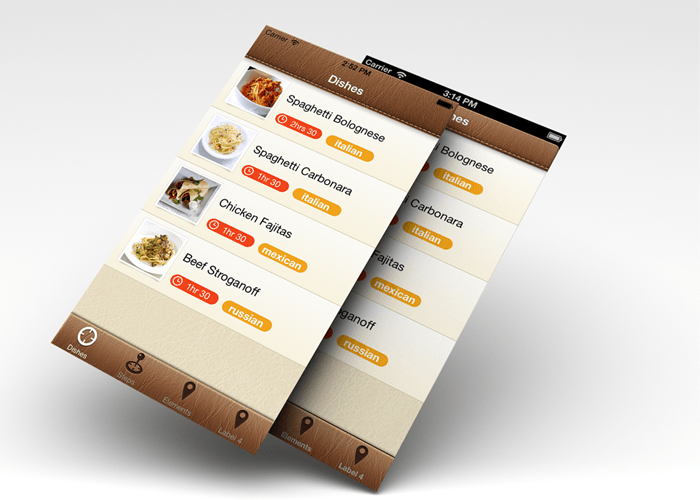
I intentionally started this case study with the Foody template because it is arguably the most Skeuomorphic of the bunch. iOS 7 tries to tone down textures and shadows but that is a matter of taste. We decided not to retire the Foody template because a lot of you do like the template as it is still one of the bestsellers on the site.
We are going to tone down the effects a little bit but the leather is still going to stay. Else, Foody will lose its identity.
The Extended Navigation Bar
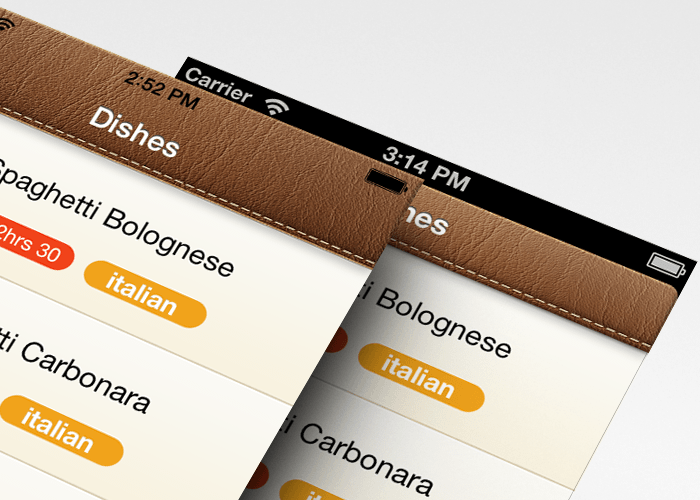
In iOS 7, the status bar and the navigation bar are now kind of intertwined. This means if you use custom images for your navigation bars, you will need to provide a separate “taller” image for the bar on iOS 7.
In my case, I exported a new navigation bar image from Photoshop which is 64 pixels high and then applied it when the user runs iOS 7.
First thing is to check whether the user in on iOS and below. This is done using a handy method
And then I use the old navigation bar background image if the user is on iOS 6 and below. Else the app uses the new background image with the 64px height.
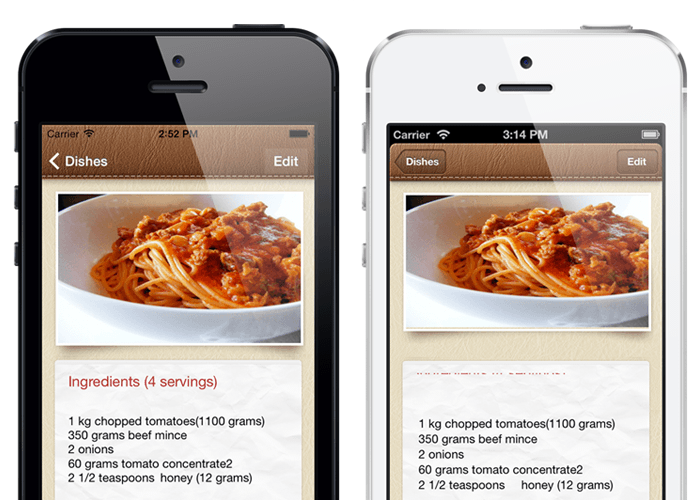
Back Button and Bar Button Items have been Toned Down

Previously, the buttons on the Foody template had an inset embossed into the leather. This style is really prevalent on iOS 6.
For iOS 7 though, I decided to go with Apple’s guidelines and implemented borderless buttons. I think it looks better because the design is not competing with the content.
For the bar button items, I didn’t go all borderless though. I included a subtle transparent white background. This helps users understand this is a button and not just some text on the screen.
Here is how it was implemented.
This was the previous code that was used to customise the appearance of the navigation bar on iOS 6.
As you can see we use custom images for both the back button and the bar button items. I did away with all that and used the default setting. But I had to make sure the colour of the text is white. (Otherwise it shows up as blue).
To apply the transparent white background on the bar button item, I use this helper method.
This creates a UIImage with the colour and size specified. I then use the method above to create a background image for my bar button item.
Original post: bit.ly/19Ho6Ht